


The Problem
Whether you're brand new to penetration testing or have some experience under your belt, you want to have a safe environment where you can learn and practice the use, exploitation, and remediation of vulnerable software and unsafe configurations without exposing yourself or your clients' systems and networks to unnecessary risks. You need a cheap environment that's easy to set up, access, and maintain, as well as to blow away and rebuild. One without licensing headaches that your entire team can access from anywhere, but still mimics a real enterprise Active Directory domain.

The Solution
I wrote a stack template for AWS CloudFormation that will spin up a functional pen test lab on the cheap, including a Kali Linux box to attack from, a Windows Server 2012 R2 Active Directory member server and domain controller ready to be Kerberoasted, and a Linux box preloaded with OWASP WebGoat and OWASP Juice Shop and ready to be loaded with more vulnerable software and configurations. You can download it here, or follow the steps below to load it into CloudFormation directly from our S3 bucket.
Although this post was written for pen testers, it may also be useful for security researchers, blue teamers, domain admins, and others who want an affordable alternative to hosting a personal on-premise test environment, which can be expensive and require a lot of time and effort to build and maintain.
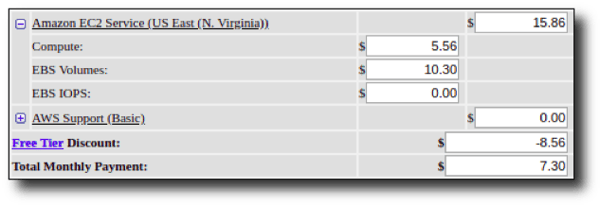
If you already have an AWS account, this lab takes about 15 minutes to set up. It's designed to use resources from the AWS Free Tier by default, so it costs less than $20/month running 25 hours/week, or even less if you can use the New Customer Free Tier discount available for the first year of AWS usage. Reasons why you should host your lab in the cloud instead of on-premise (plus a cost breakdown) can be found at the end of this post.
I was looking for a solution that met my requirements and found an excellent series of blog posts by Seth Art (aka SethSec) that provided detailed walkthroughs of how to set up a penetration test lab with Active Directory in AWS. I highly recommend you read it, particularly if you're interested in a much more detailed breakdown of the associated pros and cons, cost differences between cloud-hosted vs. local environments, etc. Or if you're a DIY kind of person and want to learn more about AWS and setting up AD, definitely give it a read. For the rest of you who just want a personal pen test lab and don't care how or why it works, you’ve come to the right place – this post should be all you need to get started.

Setting Up Your AWS Pen Test Lab - A Step-by-Step Guide
With a significant amount of help from SethSec, as well as the heavy lifting documented in this AWS Compute blog post, I made an AWS CloudFormation stack template to save you the time and effort of completing the setup of an AWS pen test lab from scratch. All you have to do is create an EC2 key pair and create a stack from this template using AWS CloudFormation by completing the following steps.
Step 1: Sign up for AWS and/or log into the console.
Step 2: Create an Amazon EC2 Key Pair.
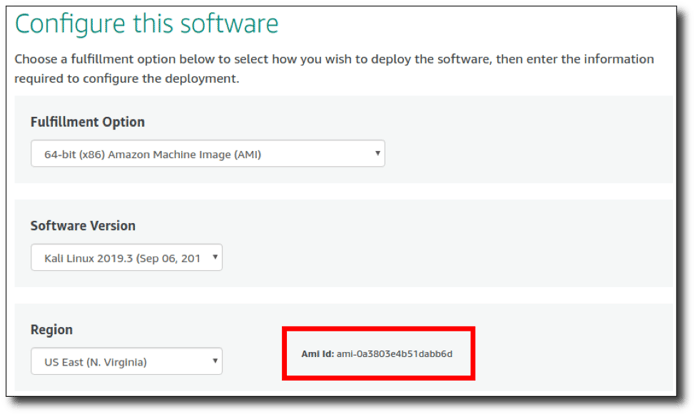
Step 3: Subscribe to current Kali AMI for your preferred Availability Zone here and click "Continue to Configuration" to identify the current AMI ID. Save this for later.
Step 4: Subscribe to current Windows Server 2012 R2 AMI for your preferred Availability Zone here and click "Continue to Configuration" to identify the current AMI ID. Save this for later.
Step 5: Subscribe to current Amazon Linux AMI (HVM/64-bit) for your preferred Availability Zone here and click "Continue to Configuration" to identify the current AMI ID. Save this for later.
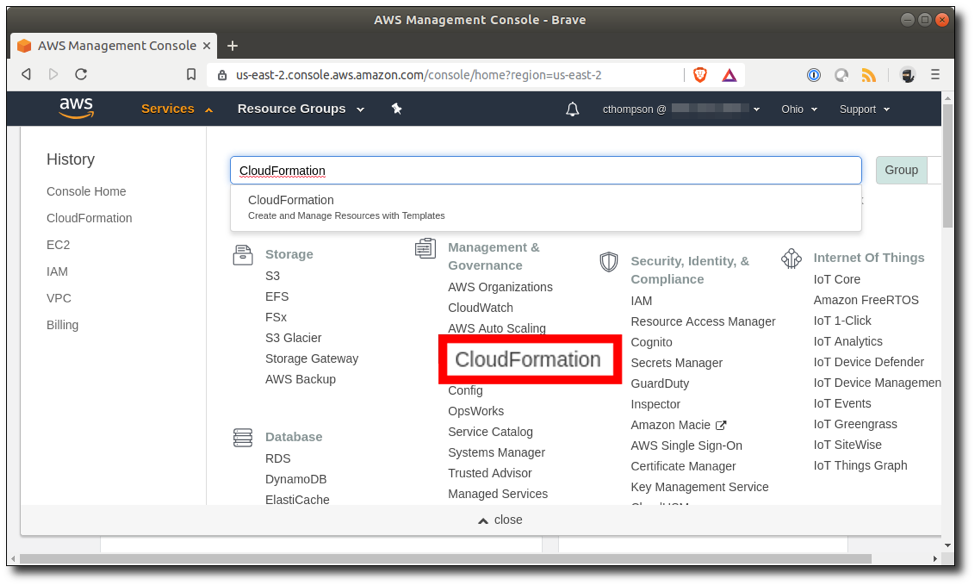
Step 6: Navigate to Services > CloudFormation.
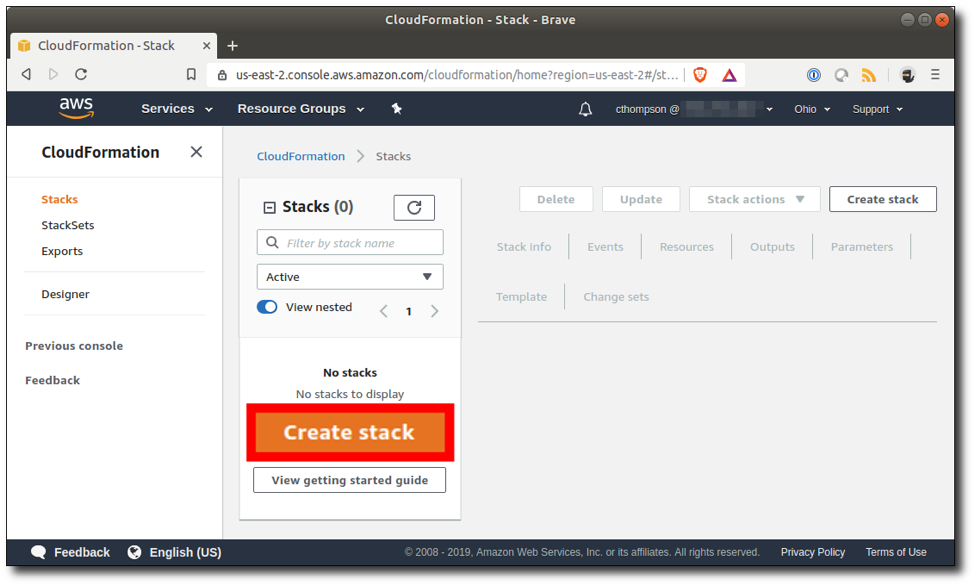
Step 7: Click "Create Stack".
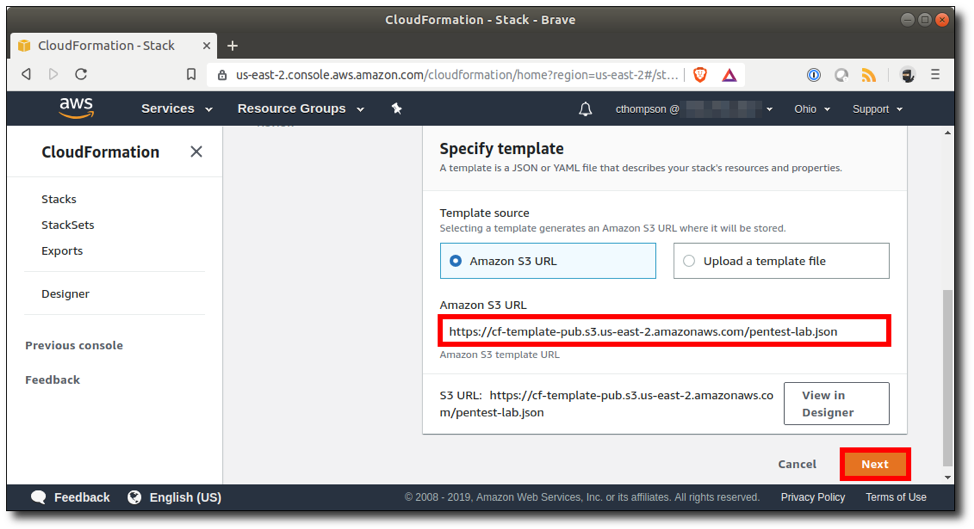
Step 8: Type or paste the Amazon S3 URL for the stack template and click "Next".
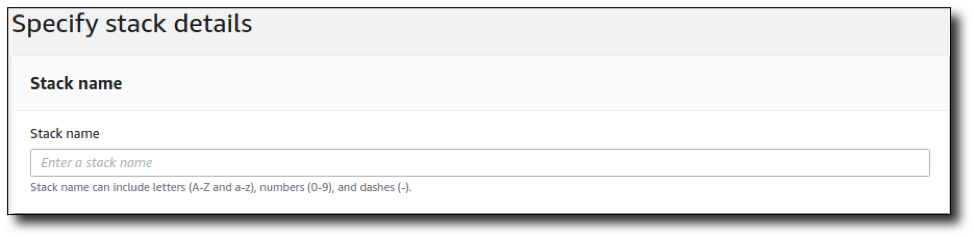
Step 9: Give the stack a name.
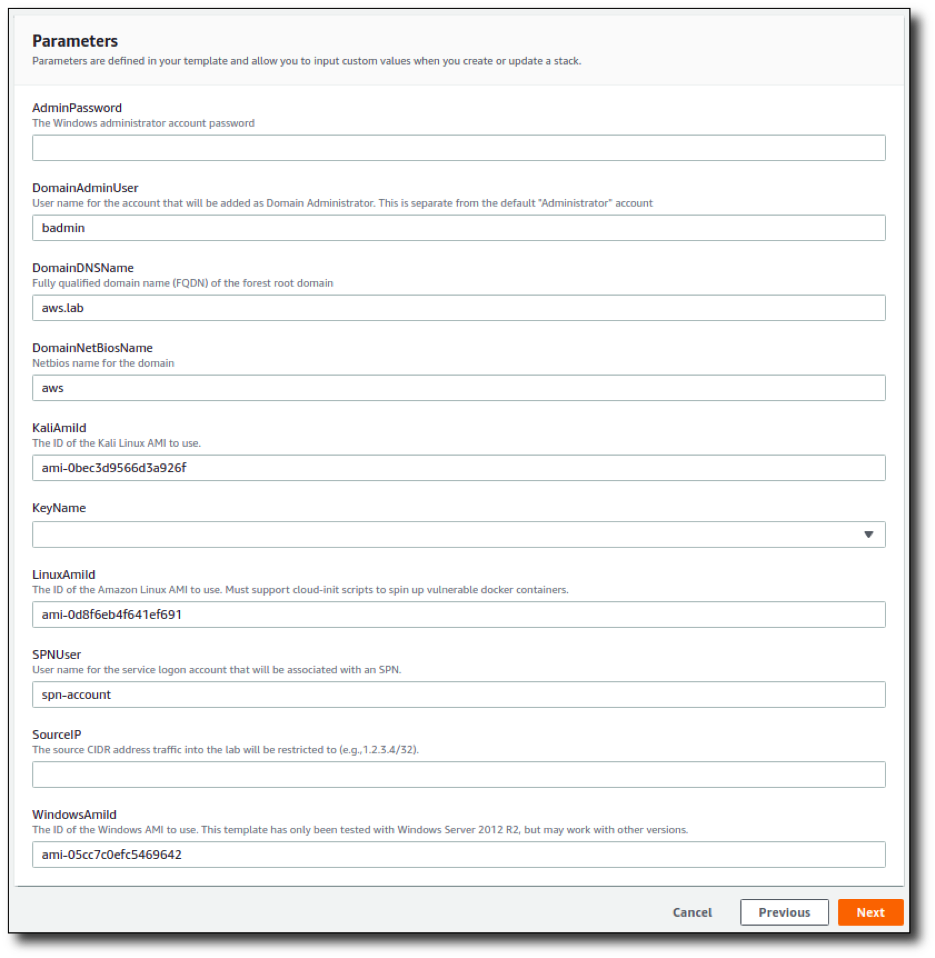
- Set a password for the Domain Admin user and local Windows Administrator accounts that meets Windows default complexity requirements;
- Specify the AMI IDs for the Kali, Windows, and Amazon Linux AMIs identified in Steps 3-5 above. Although these items are populated automatically with the AMIs available in the Ohio Availability Zone at the time of this post, they are subject to change as new AMIs are released, so they will likely need to be updated to the current AMI versions.
- Specify the EC2 key you wish to use to connect to the EC2 instances; and
- Specify the source CIDR IP address that your SSH and RDP management traffic will originate from.
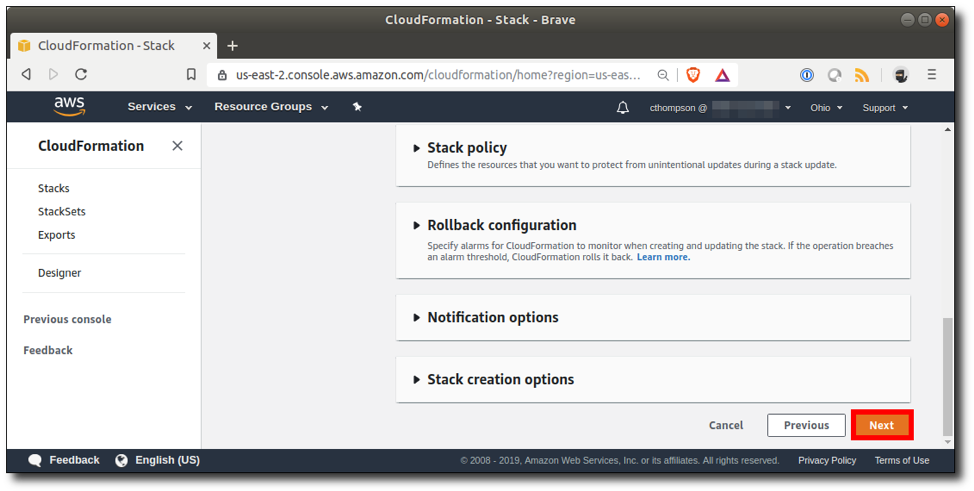
Step 11: Scroll down and click "Next".
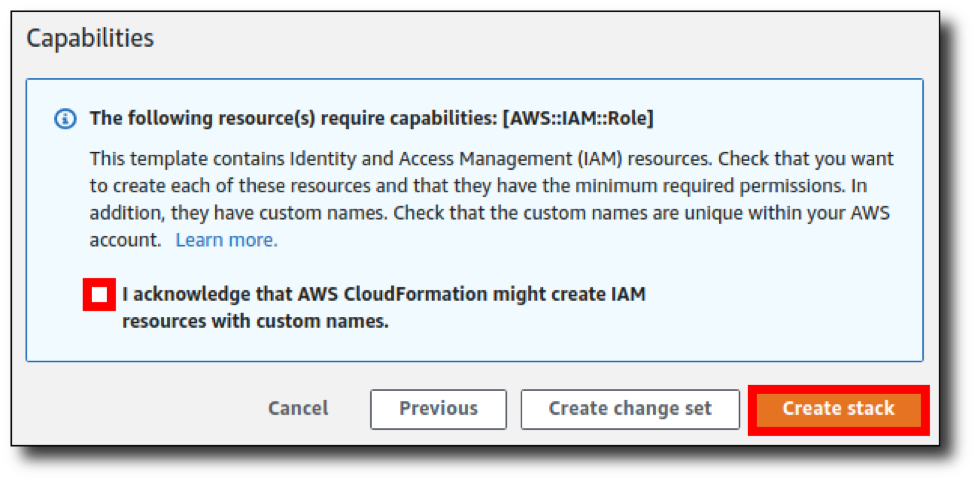
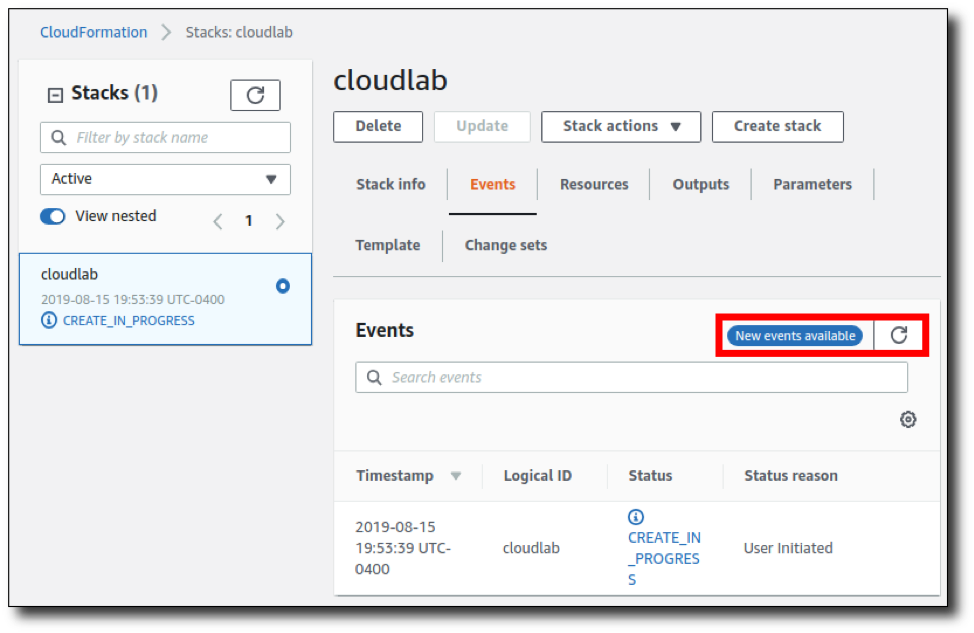
Step 13: Wait for stack creation to finish. This part usually takes about 10-15 minutes. While that’s running, the screen will display the status of the stack components as they are created. The "New events available" alert will be displayed periodically, and you can click the refresh button to view the new events as they occur.
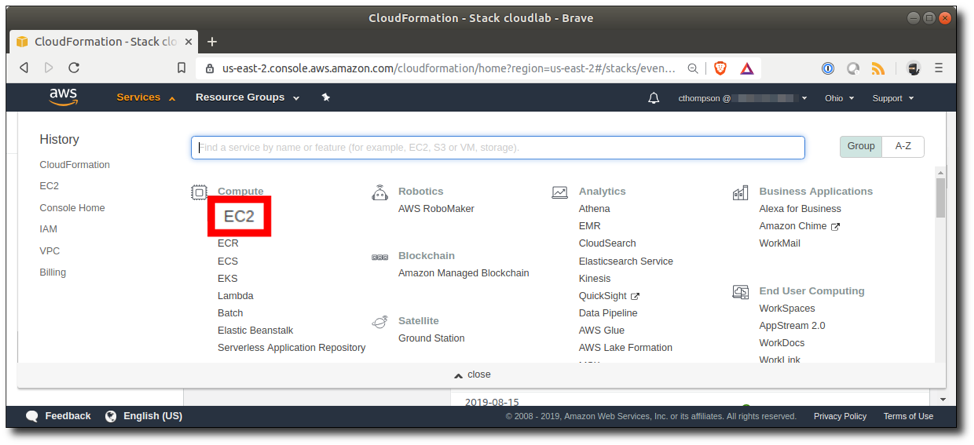
Step 14: Once the status of the name you gave the stack appears as "CREATE_COMPLETE", you're ready to go! Click "Services" > "EC2".

Step 15: Click "Running Instances".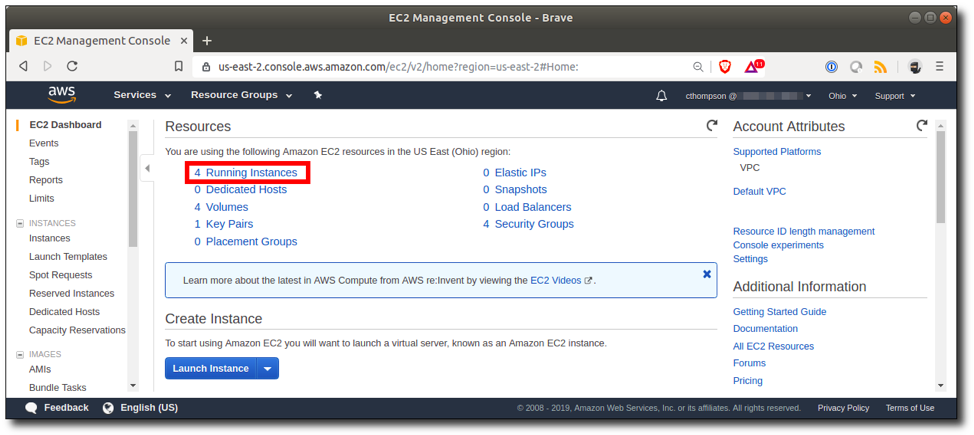
Step 16: Take note of the IP addresses for your new EC2 instances.

Step 17: You can connect to the domain controller instance using RDP as the "badmin" user or to the member server instance as the "Administrator" user with the password defined during startup, and to the Linux boxes via SSH with the following command: ssh -i ~/.ssh/[path-to-key].pem ec2-user@[ec2-ip-address]. OWASP Juice Shop, WebGoat, and WebWolf are accessible on the "VulnServ" system at the following URLs:
- http://[ec2-ip-address]:3000/
- http://[ec2-ip-address]:8080/WebGoat/login
- http://[ec2-ip-address]:9090/WebWolf/login
That's it! Enjoy the lab. The instances can be shut down and restarted from EC2 while maintaining any data you've modified on them or the whole stack can be deleted and spun up again from the CloudFormation section of the console.
The Pros and Cons
Here’s a high-level comparison of hosting your lab in AWS vs. a local environment:
| Hosting in AWS | Local Hosting | |
| Cost | Low | Medium/High |
| Setup Time/Effort | Very Low | High |
| Internet Accessibility | Excellent | Requires Additional Configuration |
| Rebuild Time/Effort | Very Low | High |
| Risk to Personal/Company Data | Low | Less Low |
| Multi-User | Yes | No |
| Simulation Quality | Good | Best |
Depending on your needs, the pros far outweigh the cons in most cases. That said, there are some disadvantages to this lab vs. hosting your own environment. First, layer 2 attacks will not work in AWS because multicast and broadcast traffic are not supported. Second, OS vulnerabilities are more difficult to introduce because AWS loads the latest available release of the AMIs by default, although it is possible to import vulnerable VMs that you have created outside of AWS. The lab is also exposed to the Internet, so although traffic into the environment is limited to the IP address(es) you specify when the stack is started, it's critically important to maintain restrictive security groups to prevent others from accessing your environment.
Approximate Cost Breakdown


Additional Lab Options
Want to add new member servers to the template so that they are launched and terminated whenever you create and delete the stack? Copy and paste "Server1" from the "Resources" section of the template and swap in a new "PrivateIpAddress".
Want to add clones of existing EC2 instances to the template, or to your own CloudFormation stack? Check out CloudFormer, a CloudFormation stack template that can collect all of the data needed to launch your existing resources and output it into a JSON file which can be used standalone or manually merged into the AD lab stack template.
Looking for more stuff to hack? Pulling vulnerable docker containers to your AWS lab is an easy method. You can add bash commands to the "UserData" section of the Amazon Linux EC2 instance in the stack template if you want them to spin up every time the stack runs. Keep in mind you may need to update the security group configurations to permit your IP address to reach any new ports exposed.
You can also convert free boot-to-root virtual machines such as those available at vulnhub.com into AWS-compatible AMIs.
Debugging
The Events and Resources tabs for the stack should indicate where the failure occurred. To troubleshoot the AD EC2 instances, set "Rollback on failure" to "Disabled" on the "Configure stack options" page during creation and RDP to the failed host to view C:\cfn\log\cfn-init.log.
Should you run into any issues building the stack, don't hesitate to reach out to me with the data in the CloudFormation Events, Resources, and Parameters tabs after failure and the C:\cfn\log\cfn-init.log file for the Domain Controller host. I'd be happy to help!
Questions?
Have questions, issues, or feedback? Looking for a pen test? Feel free to reach out to me at cthompson@focal-point.com or explore our services here.
Resources
- https://sethsec.blogspot.com/2017/05/pentest-home-lab-0x1-building-your-ad.html
- https://aws.amazon.com/blogs/compute/optimizing-joining-windows-server-instances-to-a-domain-with-powershell-in-aws-cloudformation/
- https://docs.aws.amazon.com/AWSCloudFormation/latest/UserGuide/cfn-using-cloudformer.html
- https://github.com/SecureAuthCorp/impacket/blob/master/examples/GetUserSPNs.py
Want more cybersecurity guides and insights?
Subscribe to Focal Point's Risk Rundown below - a once-a-month newsletter with templates, webinars, interesting white papers, and news you may have missed. Thousands of your colleagues and competitors have signed up! You can unsubscribe at any time.